Showing posts with label sewing. Show all posts

Monday, 19 December 2016

Homemade Christmas decorations

While we love seeing those homes who really go for it in terms of Christmas lights and decorations, our own approach to Christmas is pretty low key. A branch from a pine tree at our block serves as a little Christmas tree, and one of our few decorations was found on a local hard waste pile. 

This year though I decided to up the ante a little....while keeping spending to a minimum.

First off I decided to get a little fancy for our Christmas lunch and make some Christmas napery. In the week before Christmas I noticed that Lincraft had reduced the price of their Christmas fabric by over 50%.  For $30 I was able to buy enough 100% cotton fabric to make a tablecloth for a table that seats up to 8 as well as 12 napkins.
Christmas fabric - why go for subtle when you can be bold?

It was quick easy sewing, made even more fun as I made them in the company of my good friend and sewing  buddy, who was  busy sewing Christmas things of her own.  I was pretty pleased with the results. It will certainly add a festive touch to our lunch and it's something we'll be able to use year after year.

completed napkins and tablecloth


While I was buying the fabric I also spied some coloured felt. For a couple of bucks I got enough felt to make some garlands of little Christmas trees:

Christmas tree garland production line


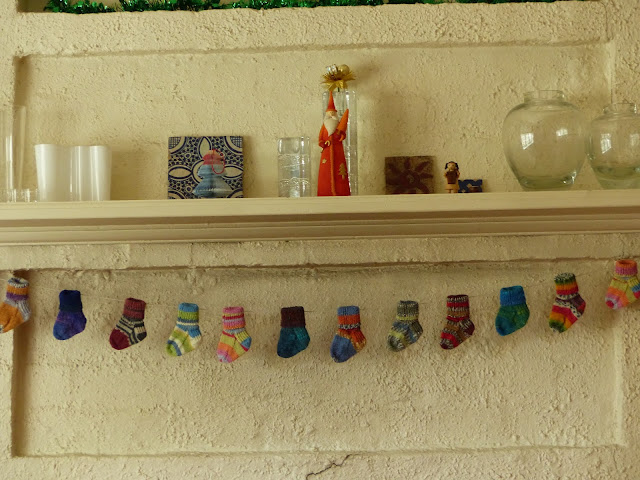
Finally, as I've mentioned in earlier posts, I like knitting socks.  I often have bits of yarn leftover after making a pair, so rather than chuck it out, I used it up to make a garland of little socks.  Strung up over the fireplace, they look sort of Christmas-y. Okay, well maybe you'll have to use your imagination here folks, but they remind me of Christmas stockings 😊


And here's the wooden Christmas pyramid we scored for free from the hard waste:


Not bad, eh?

So don't get sucked into spending heaps to decorate your home for Christmas.  With a bit of imagination, some time and some basic sewing skills you can add a touch of Christmas to your home without spending much at all.


Hope you all have a happy Christmas!

Tuesday, 26 April 2016

Mini sewing project - Repurposing

In an effort to reduce plastic in our home, we're trying to prevent bringing home unwanted plastic bags and food-related packaging.  Shopping in bulk is a one way to do this and fortunately for us a bulk food store called The Source has opened up nearby. The shop provides paper bags for shoppers to use but I decided to go reusable and sew some calico bags we can use as produce bags. 

Trying to re-purpose something we already had, I remembered I had a bunch of calico bags that came as shoe bags for various shoes I'd bought over the years.  Never having used these bags, I'd stashed them away thinking they might come in handy. Bingo!  A perfect project for the next sewing day with my crafty friend.  I look forward to these sewing afternoons - apart from being a great excuse to catch up, they ensure that planned sewing jobs actually get done. Like ironing board covers and pillowcase repairs :)  Plus two minds are better than one (well mine at least!) when it comes to working out the best way to tackle a sewing project. 

My destined-to-be produce bags had a single handle and looked like this:


To make them more suitable for carrying produce without spillage I decided to add a drawstring opening.  I had a small collection of salvaged ribbon and cloth tape, and fortunately there were a few pieces of suitable length for the job. I simply folded the top edge of the bag over and sewed along the bottom to make a casing for the ribbon, leaving one side open so the ribbon could be threaded through.


In order to make the casing and keep the handles, the handles were folded back and sewn over when the casing was made.


By a crazy coincidence, my friend's plan for the day was to make cotton drawstring bags to use to store different varieties of potatoes in her pantry.  So it became a produce bag making day - talk about being on the same wavelength! 

We had a break for lunch - yummy black bean soup and homemade bread:


 Then it was back into it and before too long I had a set of produce bags - 4 large and 1 small.


The last step was to weigh each bag and write the weight on the bag itself with a waterproof texta. That way the weight of the bag can be deducted from the total weight at the checkout. Armed with these reusable bags and my Onya mesh bags we are now ready to shop more sustainably.


Thursday, 3 March 2016

Sewing repairs - boro inspired

Our linen pillowcases were showing some wear and tear:


Funnily enough, I had already planned to repair them before I went to the Boro exhibition. But after seeing that I was spurred on to get on with it.

I thought I'd replace the centre section of each pillowslip with a good quality (and hopefully long wearing) cotton.  I'd like to say that I was doing this in the full Boro spirit with fabric I already had on hand, but sadly no, I had to buy something suitable. 

I went with a Japanese quilting fabric, bought from Kimono House


First step was to unpick the pillowcases and then pin the fabric panel in position.


 Once the panel was sewn in place along the edges, the pillowslip was sewn back together and the edges interlocked.


And here's the finished product back on the bed:


 I was pretty satisfied with the result. It took a relatively small amount of effort and we should get many more years of good use from these pillowslips .


Thursday, 14 January 2016

Mini sewing project - ironing board cover

My ironing board cover had worn through and was in need of replacing. When a friend mentioned hers had worn out too, we figured we may as well have a go at making our own

A rumage around in my small fabric stash turned up some heavy weight cotton I'd bought ages ago. There was enough to make 2 ironing board covers so we were set to go.

First step was to trace the shape of the ironing board onto the fabric. There was a bit of foam under the old cover so we used that as a guide. We added an additional few inches around the edge to allow for the cover to fold under the board and to make a casing for the elastic.


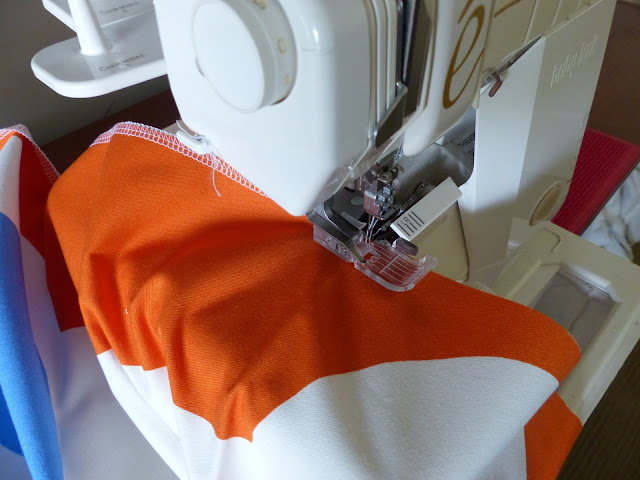
Once the cover had been cut out the next step was to overlock the edges.


Then it was time to make the casing for the elastic, leaving a gap at the end to insert the elastic and thread it through.


After the elastic was in place, the cover was fitted over the board and the ends of the elastic were tied in a knot. We then pulled the elastic tight, to fit the cover snugly on the board and used another knot to secure it in place. The elastic was then tucked out of sight into the edge of the cover under the board.  

Et voila! The ironing board was ready for use again:


As you can see the whole process was pretty simple and it didn't take long.  

It felt good to be able to make something we both needed out of resources we already had, rather than go out and buy it.