This method works best when the temperature is warm, as the higher the temperature the more liquid the honey and the faster it drips out of the mashed comb. The strainer we have holds up to one full sized frame of mashed comb so a full box of honey can take us a while to process. Up until now we have done all our honey harvesting in summer so this process has worked fine. Of course, in colder weather you could have your setup near a heater to speed up the straining process, but that's not so convenient for us as we have a wood heater and no suitable spot to set up near it.
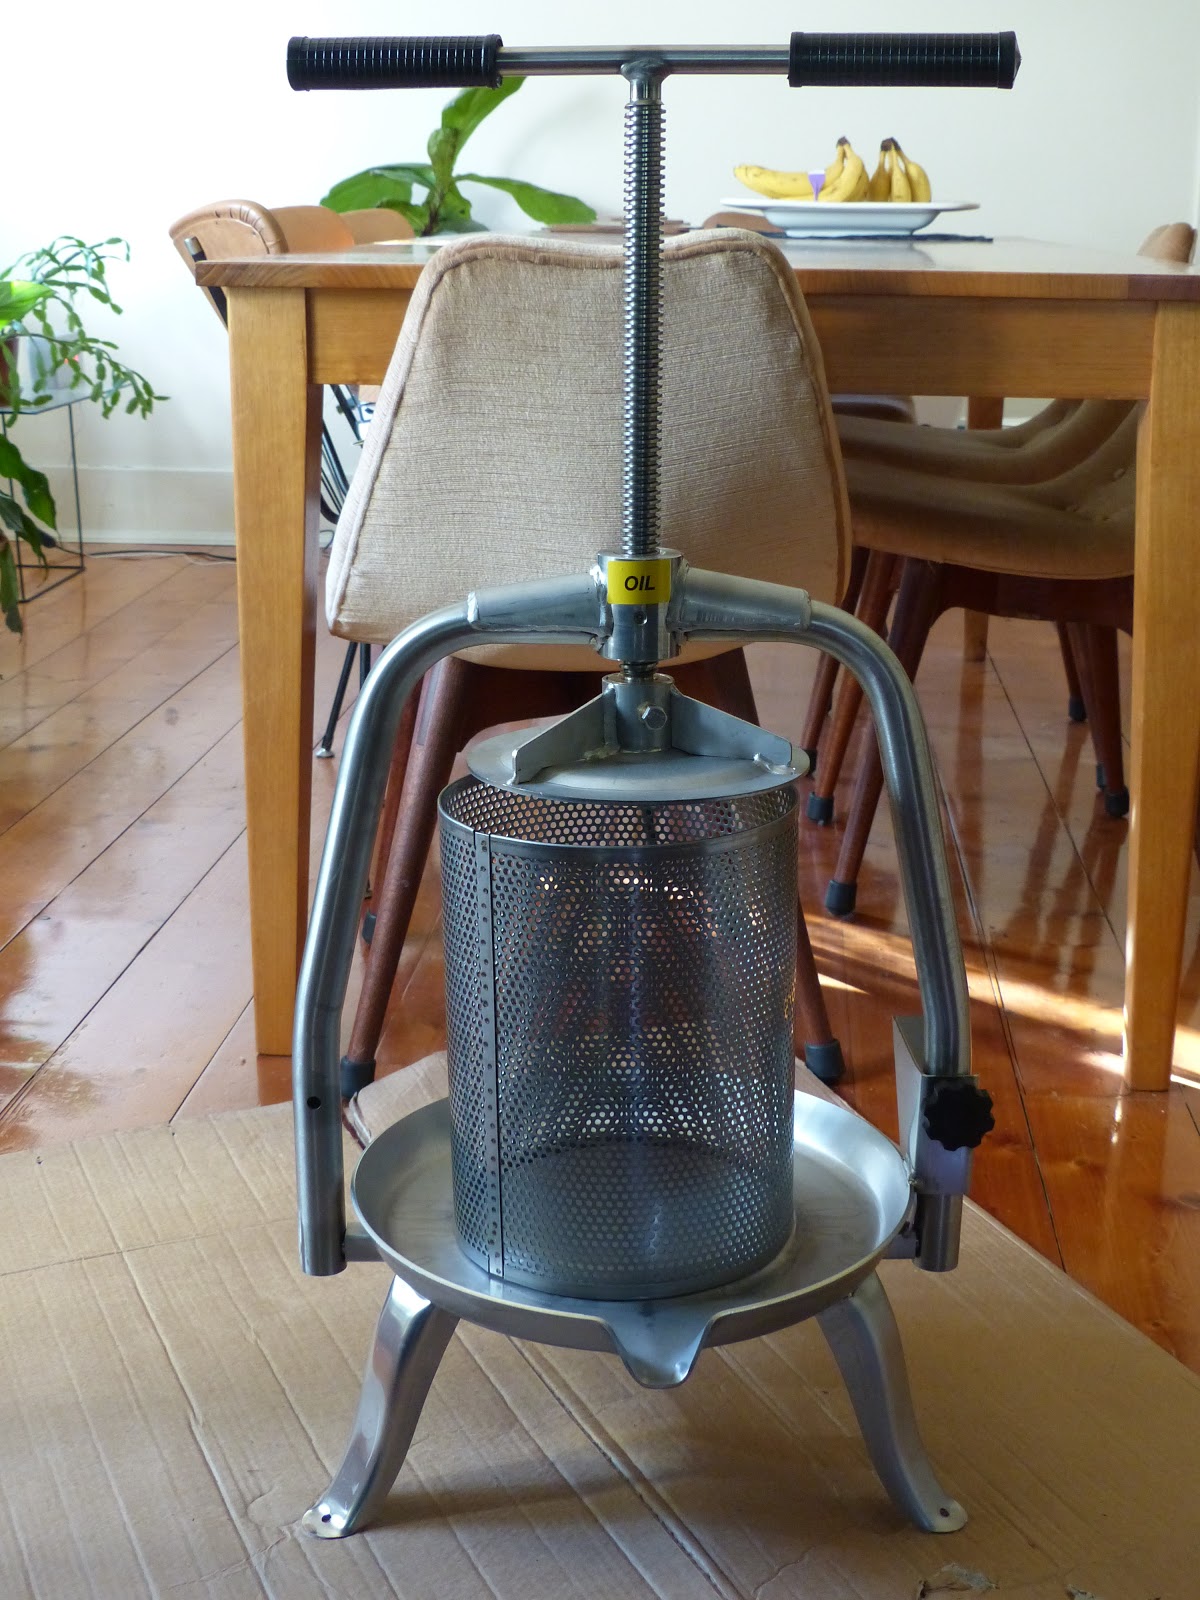
To enable us to process our honey quickly, despite the weather, we recently became the proud owners of a stainless steel honey press. It was actually sold as a fruit press but it works well for honeycomb too.
We decided to get this rather than a dedicated honey extractor for several reasons:
- For reasons of disease control we prefer to add new frames with wax starter strips and let the bees build fresh comb, rather than reusing comb.
- We don't have room in our freezer to freeze frames of comb to in order kill wax moth, nor do we have a suitable space to store and monitor frames after freezing.
- Because we let the bees build their own comb and don't wire our frames, our honey-filled frames aren't always suitable for use in an extractor. Frames in which the comb has been built out to completely fill the frame can go in an extractor but the extractor needs to be spun more gently than when processing wired frames (we've tested this).
- We can also use it to press fruit from our fruit trees.
Recently we packed down our country hive for winter into a single box. After ensuring the hive had sufficient stores for winter, we were left with some frames of honey to process. Although it was the end of Autumn and rather cold, the honey press enabled us to process the honey quickly.
Here's what we did:
Because we didn't know how it would all work out for this first time with the press we used a large piece of clean vinyl flooring to catch any spills and make the cleaning up process easier. The comb was cut out of the frames and placed in a clean, food grade plastic bucket.

We filled the mesh basket with pieces of comb and put a bowl in place to catch the extracted honey. Screwing the handle down presses the plate into the comb which crushed the comb to release the honey.

It worked really well, despite the ambient room temperature being around 15 degrees celsius.

 |
| Adding more comb to the basket |
The honey collected in the bowl was then put through the double strainer and bottled.
Here's our little harvest:

After processing all the frames we were left with a cake of sticky wax, well two actually - there was a solid layer of wax in the bottom of the mesh basket and a cake of wax stuck to the underside of the pressing plate. The wax in the basket came out easily. To remove the wax stuck to the pressing plate we used a knife to prise it loose around the edges of the plate and then a wooden spoon (to avoid scratching the plate) to lever/scrape it off.
We divided this wax into 2 oven dishes and put it in the oven to melt the wax and separate out the remaining honey, as described here.
 |
| Wax cake ready to be melted in the oven |
We found that because the wax cake holds far less honey than hand mashed and strained comb, this step didn't yield any useful amount of honey. Plus the wax cake also contained a lot of old brood comb and associated debris that didn't melt too well.
 |
| Wax cake after being melted in the oven |
So next time, if we have a lot of old comb to process, I think we'll skip using the oven and melt the wax cake using this method to clean it up. We'll do that now with this lot. The final step is purification using our solar setup which works like a charm....but we will have to wait for warmer weather to do that.
To clean the honey press I took it outside on the front lawn and blasted it with the jet setting on the hose. That removed obvious remnants from the press and did a great job on the mesh basket. I put the basket through the dishwasher for a final clean. The rest of the press can be wiped down with a suitable natural disinfectant.
The whole process was complete, including the clean up, in a few hours.
We were very happy with how the honey press performed - the increased speed, efficiency and easy clean up IMO justifies the investment, particularly as we plan over time to build up our hive numbers. Plus being able to use it to make fresh fruit juice from our various fruit trees is also something we're also looking forward to doing 😊
Update 25/5/2017:
In this instance, our usual method for cleaning really dirty wax did not result in a nice disc of wax floating on the water in the bucket. Instead we were left with some wax stuck to the underside of the flywire funnel, and a sort of waxy sludge in the water in the bucket. I'm not really sure why. Not to be deterred, we put this wax and water mixture back into the double boiler and when all the wax had melted, we poured the contents into 2 clean milk cartons and let it set.
The next day we cut a hole in the bottom of each milk carton and let the contents drain into a bucket. This left behind a wax block in each carton which was easily removed. The water in the bucket contained very little wax sludge so this extra step seemed to work quite well.