Wednesday, 16 October 2013

Bees and honey at the Royal Melbourne Show

The Royal Melbourne Show is held in September each year at the Melbourne Showgrounds, and every year Victorian Apiarist's Association (VAA) has a stall there to promote beekeeping and its related products.  This is a chance for the public to learn more about bees and taste a variety of Victorian honeys - and boy, is the stall popular!  Even before we kept bees, a trip to the Show was not complete without visiting the stall.  This year, as a VAA member, I volunteered to work at the stall and thoroughly enjoyed the experience.


Honey sampling in action

Part of the display section of the stall was a 'bee cage' - a glass walled and ventilated chamber which housed a single box hive, complete with bees.  Everyone could get up close and see the bees, watch them entering and exiting the hive and flying about inside the chamber.


the bee cage

Several times a day a beekeeper would go into the chamber and briefly open the hive so the public could get a glimpse of what goes on inside it, while another beekeeper explained to the crowd what was going on. People were queuing up to see.  The beekeepers who took on this role tended to be blokes who have kept bees for many decades, and didn't see the need for wearing any protective clothing. That in itself, elicited amazement from all the onlookers.  Calm, gentle manipulation of the hive with a minimum of smoke kept the bees calm. I never saw these beekeepers get stung.  Me, I'm not one to go without protective clothing when opening a hive, so I take my hat off to these guys and their way with bees.

There was also a single frame of bees in a ventilated glass cover that the public could get up close to.  I took a turn at sitting with this exhibit, explaining to people what was on the comb - what sections were brood, what was honey and what was nectar....and showing them the queen bee (who was conveniently marked!).  Bees do really amaze people - it was really nice to be able to take the time to show people the frame of bees, talk about it and to answer questions.  It was also a chance to let people know much our food security relies on having bees to pollinate our crops.

Ventilated frame of bees

The rest of the stall was dedicated to bee-related products for sale. This year there were 7 different types of Victorian honey to taste and buy: Redgum, Yellow Box, Mallee, Coolibah, Orange Blossom, Brown Stringybark and Grey Box.  Each had their own distinctive taste and people really enjoyed tasting them all before deciding which variety to purchase.  There was also some Tasmanian Leatherwood honey which I tasted for the first time. Leatherwood forests only occur in Tasmania so this type of honey is exclusive to Tassie. We're lucky here - Australia is truly blessed when it comes to honey varieties.


Coolibah honey ready to taste


In addition to the honeys, there was beeswax hand cream and beeswax lip balm available to sample and buy. Other products for sale included honey nectar to drink, shampoo, Manuka soap, beeswax candles, beeswax furniture polish and cute homewares printed with bee patterns.


The VAA also had a presence in the 'My Garden' outdoor area at the Show.  Two beekeepers were there to show people it was entirely possible to keep a beehive in a suburban backyard.  Demonstration hives (empty of bees) and another single frame of bees in a ventilated glass cover were used to explain to people various aspects of beekeeping. Again, this display seemed to be quite a hit with the public.


After being surrounded by honey and other bee-related products for 2 days, it was a done deal that I'd have to bring some home :)  To be honest, before we kept bees I never ate much honey.  Most honey from the supermarket tasted bland and sugary to me. Now that we keep bees I know that the flavour of the honey depends entirely on the plants from which the bees gather nectar from. This is why honey harvested from Redgum forests tastes quite different to honey harvested from Yellow Box forests, and so on. Local honeys (i.e. honey sourced from a particular location), can have a huge flavour range.  Our own suburban 'garden honey' tastes different from year to year, depending on what's in flower at the time.  These days I am always keen to try and buy different varieties of honey when I come across them.  After tasting all the varieties at the stall, I settled on the Mallee and the Leatherwood to take home with me. Not stopping at the honeys, I also trialled the beeswax hand cream and immediately bought some for myself and to give as gifts. That stuff was good!


All in all, volunteering at the stall was a very enjoyable experience, and one I will definitely be repeating in the future. It was a pleasure to spend time with other beekeepers, as well as to have the opportunity to chat to the public about bees. Hopefully everyone we spoke to went away knowing a little bit more about the lives of these very important little creatures.

Saturday, 12 October 2013

Bottling your home-made beer

So your beer is ready to bottle. You've checked your hydrometer reading and it's A-Okay.  What's next?  Well, it's time to assemble your bottles and other equipment (as covered here) and transfer the beer from the fermenter into your bottles.

Here's how we do it.

Rinse out your clean bottling valve with sterilising solution and attach it to your fermenter


Sterilise your clean stubbies and add the white sugar to each (required for the secondary fermentation in the bottle). We fill the bottle rinser with 500 ml of the sanitiser and use that to sterilise the bottles. All you do is place the bottle over the spout and push down a couple of times. This causes the sterilising solution to be sprayed into the bottle.


Then using the funnel and the priming scoop, add the sugar to the sterilised bottle.  The smallest measure on the priming scoop is the right amount of sugar for a stubbie.


The bottle is then ready to be filled with beer. Put the bottling valve in the empty bottle so that the tip presses down on the base of the bottle. Open the tap on the fermenter and fill the bottle. Remove the bottle when full and gravity automatically cuts off the flow.


Now it's time for the lid.  We spray sterilising solution on a clean dinner plate and then cover the surface with lids, with the underside of the lids facing up. Spray sterilising solution over the lids and then turn them over.  This will keep them clean while you do the bottling.


Now get your capper ready. We use a bench capper because it's easier and there's minimal chance of the bottle breaking while you're capping it. Sit the bottle on the rubber base of the capper (the rubber base is orange on our capper), sit the lid in place on the bottle, adjust the height of the capper if required, and then pull down on the lever. Release the lever and your lid will be firmly on the bottle.

 
Invert the capped bottle a couple of times to ensure the sugar is well mixed. Then repeat the process on the next bottle.  When all the bottles are done we write the date and type of beer on the caps and store them in boxes. Here's the end result of our last beer batch:


Leave the beer for at least a month before drinking as the flavour will improve over time.

And that's all there is to it - you have now made your own beer!

So what's this got to do with sustainability? That's a topic we'll cover in another post..


Sunday, 6 October 2013

In the garden .....

Our garden is buzzing....literally.


Bee on apple blossom


Bee on lavender


Bee on orange blossom


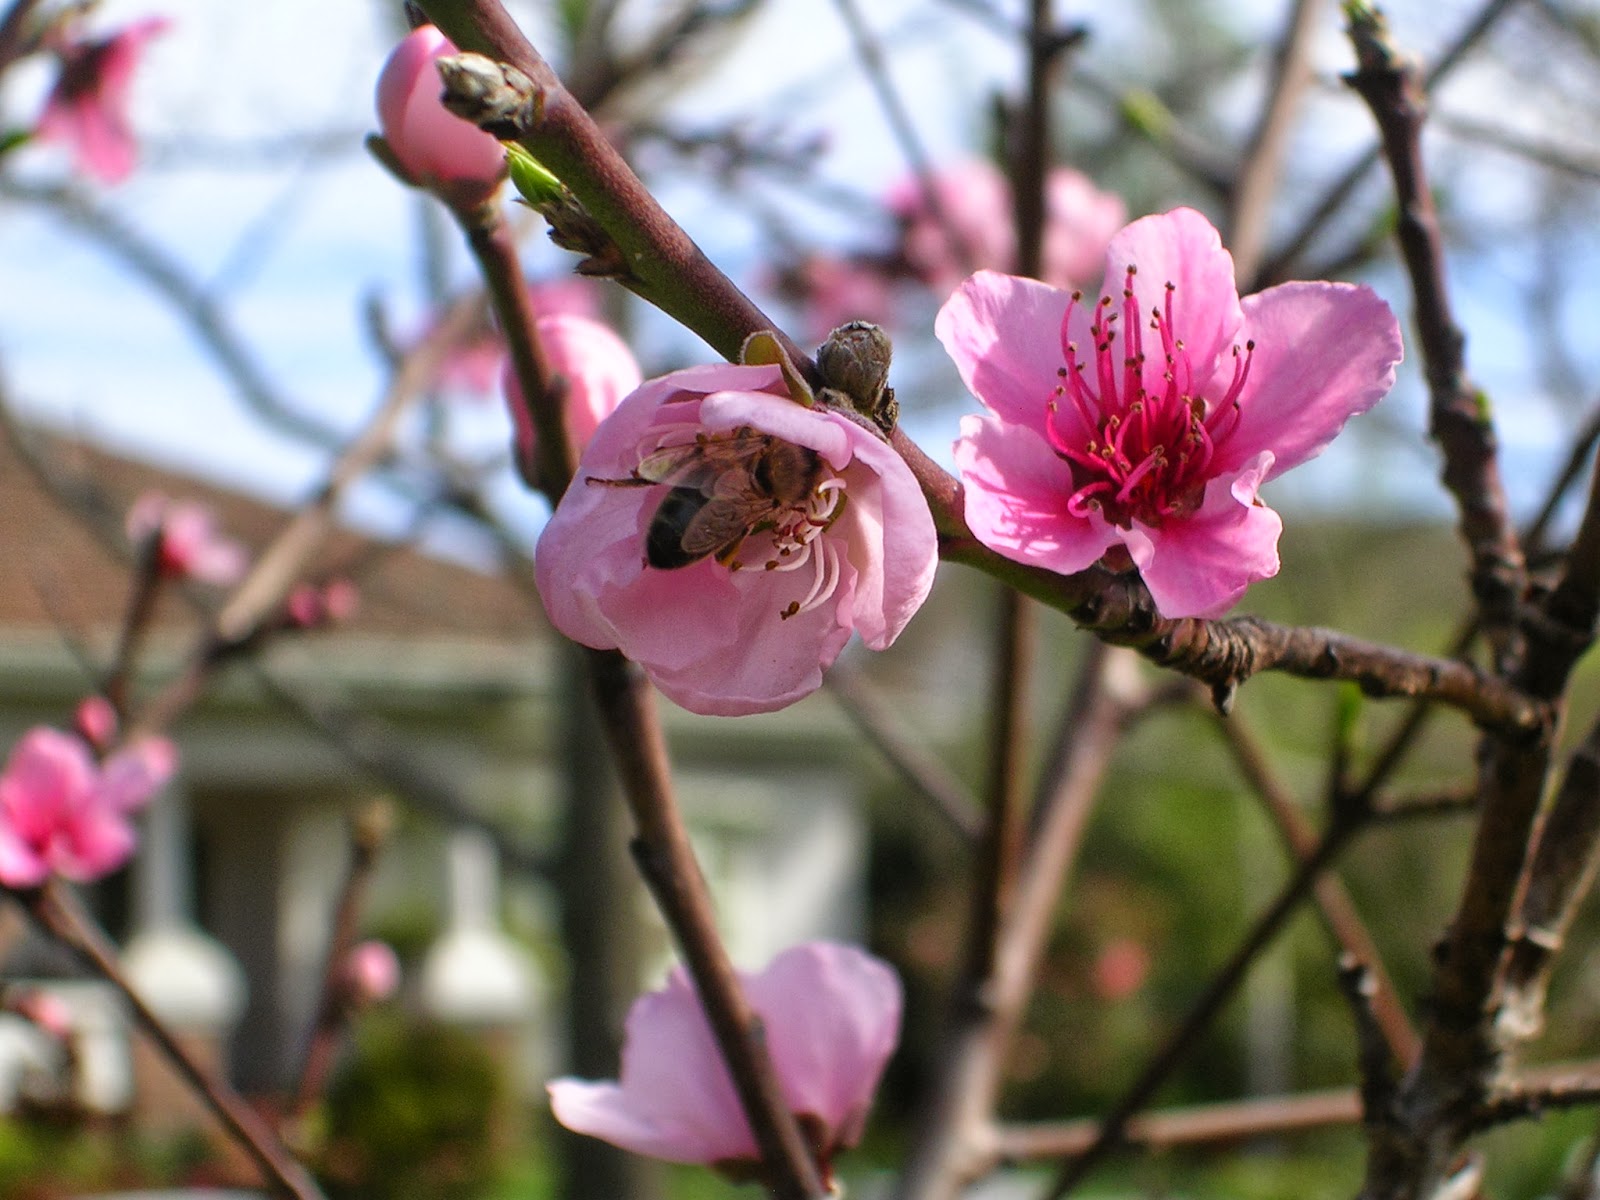
Bee on peach blossom
 
Fingers crossed all this pollination activity produces some bumper crops ....


Wednesday, 2 October 2013

Brewing beer at home

What could be more pleasant on a warm summer's day than relaxing in your productive garden with friends, enjoying the fruits of the season that you've grown yourself...and a lovely, cold, home-brewed beer?

If you have been put off by bad home-made beer in the past, it's definitely time to revisit the whole 'let's make our own beer at home' idea.  As a uni student, I made beer and to be honest, it tasted pretty horrible. Fast forward quite a few years (I won't say exactly how many) and we now make very nice tasting beers at home.  Stouts, ales, lagers - you name it, you can make it. It's easy, it saves you money and the end result is a high quality product.

Now I will freely admit we are not what you would call 'hardcore' beer makers.  We use beer kits to make our beer.  For us, this choice is primarily a matter of time and convenience. We work full-time, we have a lot on the go and there's only so much time in the day.  So we aren't driven to try to make our beer from scratch using the raw basic ingredients.  Maybe one day. Right now we are more than happy with the quality of the beer we make from kits. As are our family and friends :)

To make your own beer, you will need some basic equipment. Brewing shops, such as Australian Home Brewing, sell all the equipment you'll need as well as a wide range of beer kits. You can also purchase the bits and pieces online.

The basic equipment you'll need is listed below. It sounds like a lot of stuff but the more expensive items you only need to buy once.   You'll find that your set up costs will be recouped once you've made a few batches of your own beer, if you compare how much it would have cost to buy the equivalent amount of beer at the bottleshop. That's the way we looked at this initial cost outlay.

Here's what you'll need:
 

A large stainless steel stockpot. You probably already have something that fits the bill.

A slotted spoon. For stirring the beer mixture.

A 30 litre fermenter with fittings (tap, airlock)


Cleaning agent. For cleaning the fermenter and other equipment after use. 'Brewclean' is one such product.


Sanitiser. For sterilising the equipment prior to making a batch of beer. One such product is called 'Brew Sanitize' (shown below). This is a concentrate.  You dilute 30mls of sanitiser with 970 ml water to make 1 litre of sanitising solution that's ready for use on your equipment. We store this in spray bottles for ease of use. A bottle of Brew Sanitize lasts us quite a while.


A hydrometer and plastic test flask. This is used to check the specific gravity to determine if the beer is ready to bottle.


For bottling your beer you'll also need the following:

Beer bottles. Save your own stubbies, and get your friends to do the same. Not having to buy bottles keeps your costs down. Wash the bottles and store the clean, dry bottles in a box to keep them clean - having clean bottles ready to go will save a lot of time when you are preparing to bottle your beer. Amber or green glass bottles are better than clear glass or plastic. Non-twist top bottles are reputed to be better than twist top bottles with respect to cap sealing.
 
Bottling valve. This attaches to attach to your tap. You place the valve in the empty bottle and pour. Remove the bottle when full and gravity automatically cuts off the flow. This fills a bottle quickly with no waste.


Bottle caps/crown seals. These come in packets of 250 upwards. Non-recyclable.

Bottle rinser.  Used to sanitise the bottles before adding the sugar. You can do a whole batch of bottles quickly using one of these. Not required but very useful.


Priming scoop. Used to add sugar to bottles before adding the beer. The sugar is required for the secondary fermentation within the bottle.

Small funnel. Mess-free way of adding the sugar from the priming scoop to the beer bottle.


from left: priming scoop, funnel

A bench capper (for bottling the beer). These work much better than the hand cappers and are worth the extra investment.


So that's the equipment covered. Now it's time to buy a beer kit.  You can get these at some supermarkets, but the best ones are available at home brewing shops.  The range is impressive - you name a beer, there seems to be a kit to make its equivalent. Beer kits have certainly come a long way in the last decade!

Each kit comes with all the ingredients you need to make your brew, as well as instructions on how to make it. 


kit contents


Instructions

We follow the recipe but tend to do the combining of all our ingredients in the stockpot on the stove, before adding it to the sterilised fermenter. 

It's best to get your fermenter equipment ready before making the beer.  Your fermenter must be clean and sterilised.  We always clean it out after bottling a batch of beer - it is much easier to do this then, rather than doing it later after the residue is all dry and caked on. Then all we need to do is sterilise it before use.

To sterilise the fermenter, lay a clean tea towel on your kitchen bench, sterilise your clean fermenter with your sterilising agent (a spray bottle containing the sterilising solution works well here) and sit it upside down on the tea towel to drain. Sterilise the fermenter lid and place it on the tea towel (underside facing down). Rinse the airlock with sterilising solution and lay on tea towel. Once that's done, you're ready to start the brew in your stockpot on the stove.


sterilised fermenter and lid sitting on clean tea towel

Follow the recipe in the kit, adding the ingredients to the pot as specified and stirring with your slotted spoon to completely dissolve.


Once the brew is ready, pour it into the fermenter, and top up with cold water as per the recipe instructions. Add the yeast when the temperature of the brew reaches that specified in the recipe.  Screw the fermenter lid on tight, re-sterilise the end of your airlock and place the airlock (containing clean water or a non-rinse sterilising agent) in position in the lid. Place your fermenter somewhere out of the way and out of direct sunlight. Then leave it to do it's thing. You should hear a 'blupping' noise coming from the fermenter within about 24 hours.  This is the yeast doing it's job.  Leave it for a week or so and it should be ready for bottling. Check the specific gravity with your hydrometer to ensure that it is ready for bottling. If it's not quite ready leave it a few more days and check again. You want to get this right otherwise you run the risk of exploding bottles of beer - not nice.

We'll cover the bottling process in another post.

photos 1-5 via


Saturday, 14 September 2013

In the garden .....

The bees are busy gathering nectar and pollen for the spring build-up. Check out the load of pollen this particular worker has gathered in her pollen sacs (located on her back legs)!
 
Bee on miniature peach tree blossom


Saturday, 7 September 2013

Making a no-dig garden bed

When we first moved into our home, the backyard was a blank canvas. There were a few trees dotted around the fence line, but the remainder was all grass.  Not wanting to expend unnecessary effort creating garden beds, we opted to make them the 'no-dig' garden way. 

A no-dig bed is composed of layers, and as the name suggests, there is no digging involved. Below is an example of the layers in a no-dig bed. This nifty display was made by a talented friend for use as an educational tool at one of our local permaculture stalls.


The first (i.e. bottom) layer is placed directly on the mown grass and is generally something like heavy cardboard, thick layers of newspaper or old wool carpet. It's important that this layer is made of natural materials so that it will eventually decompose. This layer acts to smother the grass below and kill it by the time the material in the layer has decomposed. The pieces in this layer are overlaid so that the grass is completely covered and it is then wetted to compact it and remove any gaps. 

Here's a picture of the bed being made at our place.  The first step was to outline the edge of the bed with some second-hand bricks we had collected.  The bed along the fence line in the right of the picture was made earlier using the same no-dig method.


Once the outline was complete, the cardboard was laid down. We sourced the cardboard from my workplace, and from the local deli. They were happy to give it away.


Once we had the cardboard in place we dug a snug channel to lay the bricks in so that the top of the brick was level with the ground. Newspaper layers placed around the edge of the bed (tucked under the cardboard) were positioned to extend into the channel and up the other side towards the lawn. The bricks were placed on top of the paper in the channel.  This was done to create a barrier and further discourage grass from  the lawn growing into the bed. We then added another row of bricks on top of the first row to help keep the rest of the layers in the bed.

Then it was time to add the lawn clippings, leaves, compost, dirt, and whatever else we had on hand.  We weren't in any rush to plant into the bed so we didn't really worry too much about following strict guidelines of what should go in the layers. We wanted to recycle the nutrients from our garden and just use what we had. If you are wanting to plant into the bed relatively quickly then it's better to follow the recommended layer recipe.


Over time and with the addition of our home-made compost, the soil in this bed has become rich and full of worms, making it very productive. Asparagus, rhubarb, various herbs, lettuces, silverbeet, cape gooseberries, raspberries and boysenberries now surround the original fruit trees in this bed.  In fact it's hardly recognisable from the early photos.  The brick channel we dug has done a great job of stopping the lawn growing into the bed. We even made a further smaller no-dig bed just in front which contains our babaco and strawberries:


Making a no-dig garden bed is easy and involves none of the backbreaking effort that would otherwise be required to dig up the lawn.  We wouldn't make our garden beds any other way!


Monday, 2 September 2013

Backyard Inspiration

Living willow fences and arbors


How great would it be to sit in this shady spot on a hot day?


All images from here


Monday, 26 August 2013

Harvesting honey the simple way - Part 3: Getting the last of the honey from the strained comb

Once the honey is in the jars (see Part 2) we were left with plastic containers full of the sticky, strained, mashed comb.  It is possible to extract the last of the honey from this, leaving just the wax behind.

Here's how you do it.  Place the strained comb in a large ovenproof dish and put it in the oven at 70 degrees celsius until it all melts.  Turn the oven off and let the mixture cool. The wax and honey will separate. The wax will form a layer at the top with the honey below.  Remove from the oven and make a crack in the wax in one corner. 


Hold the dish at an angle and let the honey flow out into clean jars. You'll be surprised at how much honey you get!

 
This honey still tastes great but as it has been heat treated it has lost some of its natural goodness........ and as a result we prefer to reserve it's use for cooking.


So you now have additional jars of honey and a separate layer of wax. The wax can be further purified for uses such as candle making.  More on that another time.