Thursday, 31 December 2015

It's too darn hot

Another 39 C day - yuk.  Summer in Melbourne can be just too darn hot.  While we and the pets spend time inside in front of the fan, the beehive gets at least some of the hot afternoon sun.

Here's what we do to spare the girls some of the heat.

A polystyrene box full of water and foam floats is placed on top of the hive. 


Not only does the box of water insulate the hive by stopping direct sun hitting the lid, it also means the girls don't have to travel far in search of water to cool the hive.

We also lean a sheet of masonite (foraged from a hard waste collection) against the side of the hive to shield it from direct sun. The masonite board is heavy enough to stay put in mild winds, and the hive location itself is sheltered from the wind, so the system works well.


In addition to observing the hive, we weigh it on a regular basis to get an idea of what's going on inside.  It has been interesting to note this year how quickly the weight dropped over the hot days. Some weight loss is not surprising - instead of bringing in nectar, the foragers are out gathering water to use to cool the hive, and they are consuming their stores in order to have the energy to make the flights. What surprises us is why we didn't note a similar weight drop over the extended hot period we had in Melbourne during the summer of 2014.

How do you manage your hives in summer?


Tuesday, 29 December 2015

Beautiful garden pests

Our fruit trees are being ravaged, by garden pests of the most attractive kind:


Rainbow lorikeets (Trichoglossus haematodus), are very common in our area, and particularly so at our place. Males and females look alike with a mauve head and belly, green wings, tail and back, and an orange/yellow breast. 


Our yard must be like a smorgasbord - apricots, plums, pears, apples, nectarines, peaches, they devour them all, well before they have a chance to ripen.

They are not discouraged easily.  Stern words and shaking of the tree branch are just met with at "yeah, whatever" look.  Secure netting will give them pause, unfortunately we were a bit slow in that department this year and our trees got too big for us to net.

Just as well they are so cute....


Saturday, 19 December 2015

Grow your own chair

A friend sent us this link to some amazing furniture grown from live willow by furniture designer Gavin Munro in England. Using this technique it can take anywhere between 4 to 8 years to grow a tree into a chair.

Some photos of the process are shown below:

The chairs growing in the field:

via


A close up of the growing chairs:

via


And here is the finished product:

via


via


Amazing huh?  Eco-friendly and no assembly required.  Check out the full story and all the images here


Friday, 18 December 2015

Saturday, 21 November 2015

In the garden .....

Where has all the time gone?  Spring is almost over and our fruit trees are looking pretty happy with life. Here's what's happening in the garden today ...

Almonds

Red currants

Pears

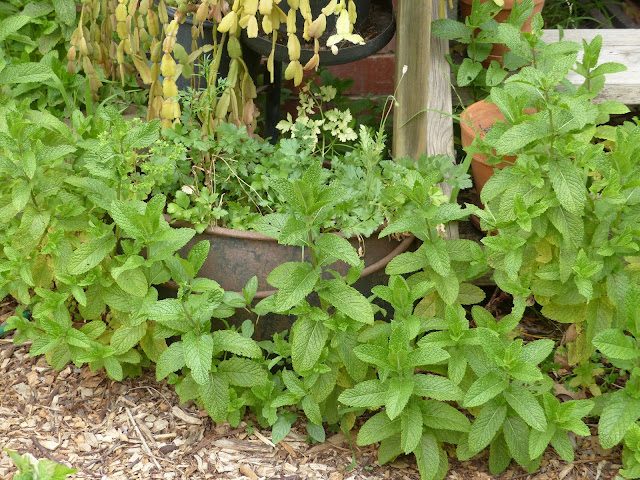
Mint is taking over

A good Myer lemon crop

Apricots

Horseradish and golden marjoram

Peaches

Our loquat tree also bore well - attracting the attention of crows who ate all the fruit from the upper part of the tree. However there was still plenty left for us on the lower branches.

What's happening in your garden?


Sunday, 9 August 2015

A sustainable property in Flowerdale

Last weekend we visited the sustainable property of Trent and Vikki who live in Flowerdale, roughly 60km north of Melbourne.  

Our visit was prompted by buying several hundred tree guards and stakes that Vikki and Trent had listed on ebay. When chatting to them on the phone beforehand to arrange pickup we discovered Trent and Vikki are committed environmentalists who live off-grid on a 70 acre property with solar-powered electricity, solar hot water and a composting toilet.  Needless to say we were looking forward to meeting them and seeing their property.

Trent is a full time environmental campaigner and Vikki is a nurse who strongly believes that one can't be a humanitarian without also being an environmentalist. Both are actively involved in campaigning to save the endangered Leadbeater's possum in the Central Highlands.

In 2009 the Black Saturday bushfires tore through Flowerdale. Fortunately, Trent and Vikki managed to save their home. A few months after the fires, they were married on the property.  On the wedding day, rather than bringing gifts, the wedding guests helped the bride and groom plant 2000 trees. Today those trees cover the hillside behind the house.

After a cup of tea and a nice chat by the fire, Trent and Vikki were kind enough to give us a tour of their property.  Trent built both the house and the barn himself, living in the barn loft while he built the house. Both buildings are clad with waste wood from a sawmill on the Murray River. But he didn't stop there - Trent even made the dining table and seating from sustainably sourced Ironbark
 
.


The barn hosts a PV installation


 And a building adjacent to the barn holds the battery bank that stores the captured energy.


Here's Trent and Vikki's son Jarrah showing us how it all works:


The family grows their own food, having a nice big vegie patch and an orchard. Chickens supply eggs and carry out pest control in the garden.


Waste wood was also used to make the post and rail fencing around the property:


After the tour they helped us pack up the tree guards and stakes. Here's what we came home with:


It was great to meet Trent and Vikki and see a couple putting into practice their values of trying to live sustainably and treading lightly on the earth. 

In the garden .....

It's still winter here, but in our garden the almond pollination is in full swing ...


 The girls are working the rosemary too


We have a good crop of oranges and lemons 


And then there are the flowers ...


What's happening in your winter garden? 


Monday, 3 August 2015

Backyard Inspiration

Loving this DIY bean trellis recently featured on Gardenista.com:

Gardenista

Once the beans have grown they are easy to harvest. Looks pretty good, doesn't it?

Gardenista


Check out the full Gardenista post for the DIY details.

Saturday, 1 August 2015

In the garden .....

I had some company while weeding the garden today - a couple of Eastern Rosellas were very interested in the proceedings....


Saturday, 6 June 2015

Spoon carving workshop - Part 1

When we were at the Lost Trades Fair, we signed up to do a spoon carving workshop at Rundell & Rundell.  A few weekends ago we headed back to Kyneton to learn how to carve spoons from experienced spoon carver, Pete Trott.

There are lots of ways to make spoons from green wood.  Some methods use power tools and other machinery to get the spoon to the point where it's ready to hand carve.  The method Pete taught us used 3 tools only: an axe to shape the spoon blank from a piece of wood and 2 simple Swedish hand carving knives. That was it - we're not even talking using sandpaper here.  So what do Pete's spoons look like? Well as you can see below, they are beautiful as well as functional. Unfortunately my photo doesn't do justice to showing how smooth their finish was or how lovely they felt in the hand.


Okay, the first thing we did was select a piece of blackwood (Acacia melanoxylon) for our spoon.  The wood was cut that morning. Here's what we had to select from:


As you can see, there was a long way to go to turn that lump of wood into a spoon!  

For a workbench we each had stump with a divot cut out of the centre where we could place the wood to stop it slipping while we were using the axe.


Once we'd selected a piece of wood we drew our spoon shape on it.  Looking at the grain and the shape of the wood helped determine where best to draw the spoon. The thicker end became the bowl as that enabled a deeper spoon.

After a safety demonstration it was time to start axing that wood.  I'll admit first up that I have no axe skills.  It's Mr PragSust who chops all our wood at home.  So it took me a while to get the hang of it.  Pete drew a picture showing us the chopping directions we'd need to use. 


We held end of the wood in one hand and used the axe with the other, making sure the hand holding the wood was well away from the axe.  I eventually chopped out a rough spoon shape, known as a spoon blank.


Here's a shot of the axe I used:


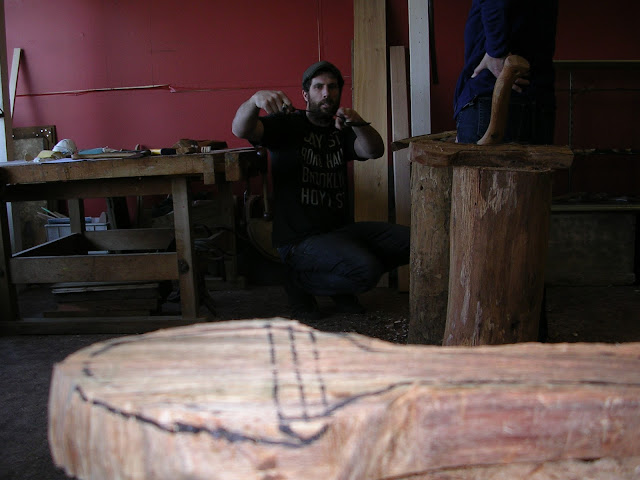
And here's Pete, providing instruction on the shaping of our spoons and encouraging us:


Once we had the rough blank it was time to start shaping it. The lines across the spoon indicate where a wedge was to be made using the axe.


And here's my wedge:


Now it was time to start shaping the underneath of the spoon. First was to cut away the portion underneath the tip - that's the part underneath the black line in the above photo.

Here is the work in progress. The circle was drawn on the base of the spoon to indicate the area to leave as is.  We're still using an axe for all the shaping at this point.


There was more shaping to do, as indicated by the lines drawn along the handle and the lines for cutting another wedge.


Once I'd cut away that excess wood, it would be time to start using the hand carving knives.

I didn't progress as far as I'd hoped on the day, but it was not surprising given my lack of axe handling experience.  The axe cutting has to be done in a controlled and careful manner - cut too far and you have to start again from scratch with another piece of wood.  

Pete showed us how to use the 2 Swedish hand carving knives and I had a bit of a go at carving out the bowl of my spoon before we had to pack up for the day. There were hand carving knives for sale and I bought a pair so I could finish off my spoon at home.  They are super sharp and it would be very easy to take a big slice out of a finger .... so I will be sure to be very, very careful.  Pete suggested that we use plenty of elastoplast on fingers and thumbs to protect them when we are carving. I'm think that as a precaution perhaps kevlar gloves might also be in order.

For those of us who didn't finish our spoons, Pete advised us to wrap them in gladwrap and store them in the freezer until we were ready to do some carving. Spoon carving is best done with green wood. Once Blackwood dries out it is very hard and trying to hand carve it would be a nightmare.


I'd say I have quite a few more hours to go to finish my spoon.  I'll post an update on my progress. Of course the more spoons you make the quicker you get at it. Pete, for instance, whipped up a spoon blank and had it shaped and ready to carve in next to no time.  We have a good supply of bits of wood that would be suitable for spoon carving so it's something I'd like to get better at :)