Showing posts with label bees. Show all posts

Thursday, 23 February 2017

Hive goes on a road trip

Back in December we split our hive so that we could take a new hive to our country block. An inspection in mid-February showed the 5 frame nuc was pretty full and bees were starting to build comb in the roof space.  A good indication that it was ready to go into a full size box. So we decided it was time to take this little hive on a road trip.  

We had always planned to move the hive while it was still in the nuc for the following reasons:
  • Nuc base is attached to hive body - no chance of separation occurring during transit
  • Hive body has clips that securely attach it to the lid
  • Good sized ventilation hole at back of hive that should provide sufficient air when front entrance is blocked for transport
  • Nuc fits nicely in back seat of car and can be secured with a seatbelt.
  • Nuc size makes it easy for one person to lift
Our 5 frame nuc, viewed from the back


I'll admit to being a bit nervous about taking a 2 hour trip in the car with a hive. To make sure we were as well prepared as possible we created a step by step plan of how we'd go about the move and ran it by a couple of experienced hive movers.  In our plan we also had to incorporate a means of feeding the hive, at least until we could establish if it was finding enough forage in the surrounding area.  

A hive in suburbia has ready access to some sort of forage most of the time; particularly in Melbourne's leafy eastern suburbs. However our country block is surrounded by grazing farms and large monoculture eucalypt and pine plantations. Local grazing farms - and our block - at times can have areas of useful bee fodder weeds such as capeweed and wild radish/turnip. We have some clover in our pasture. There's also some smallish areas of native vegetation starting at about 1km distance, various other weeds in roadside verges and on our block some paddock trees and earlier plantings that provide some pollen and nectar. And we're planting a load more trees that all going well will eventually provide excellent bee fodder. However, what's available now might not be enough for a new hive to amass enough stores in time to see out the winter. There are wild bee colonies in dead tree hollows - standing dead blackwoods do a good job of providing this accommodation -  around the place so bees live in the area but as we were taking the hive down there at the tail end of summer, we wanted to make sure it had enough supplies if current forage was slim. 

To further complicate things, we have curious wombats (not so jokingly known as 'bulldozers of the bush") on our block. This makes attaching an external feeder more problematic as these rather large critters could easily knock it over if they decided to investigate the hive on their nightly rambles.  Any time we do anything new at the block the very next visit shows that wombats have given our efforts the once over and usually left a deposit to show they've visited. A month or so prior to the hive move we'd placed a large concrete paver in position for the hive to sit on. Our very next visit showed this has been well truly pooped on and scratched around! 


Wombat on nightly ramble - source


Okay, back to the hive move. The process of moving our hive was done over 2 days in February, as described below.

Day 1
Materials used:
Spare 8 frame box
Bee escape gear
Entrance closure equipment - piece of wood and gaffer tape
Large ziplock bag
Sugar - to prepare a solution of 2:1 sugar syrup

The nuc was going into an 8 frame box so we needed 3 additional frames.  Foraging conditions in the country are quite different to suburbia so we wanted to ensure the new hive had plenty of stores.  To do this we took out 2 frames of honey and one frame of drawn comb from our main hive and replaced those frames with new frames that had wax starters strips. To get the bees off the frames we used our bee escape gear. We placed the frames in the spare box and used the bee escape lid to enable the bees to leave the frames of their own accord.


Bee escape lid and base, box contains frames of honey

Bees starting to crawl out the mesh cones - see far left and far right cones

A couple of hours later there were no bees in the box.  We took the frames inside and securely packed them in a foam broccoli box so they wouldn't move around during the car trip.


Bubble wrap and cardboard used to stop frames from moving and spilling any of their contents

Once it was dark it was time to close up the hive in preparation for the relocation.  We used a strip of wood and lots of gaffer tape to close up the entrance and secured the hive with an emlock.

We also ensured that the car had enough petrol for the trip so we wouldn't have to stop on the way. We didn't want to make the 2 hour journey any longer than necessary.

Day 2: Moving day
Materials used:
1 8-frame box, lid and base, hive mat
1 ideal size box
large ziplock bag of 2:1 sugar syrup  
large plastic container in which to sit bag of sugar syrup
sharp knife to slit holes in sugar syrup bag

We packed the gear into the car and then put the nuc on the backseat (rear end with ventilation hole facing forward) and strapped it in using the seatbelt. Fully confident in my hive closure technique, Mr PragSust opted not to wear a bee suit as he drove. I, on the other hand, sat in the back next to the hive in my full suit - just to keep an eye on things.

We were on the road by 6.30 am and reached the block around 8.30 am. There were no escapees during the drive which was great.  The forecast was for partly sunny and 20 degrees but it was pretty cold and overcast when we arrived.  
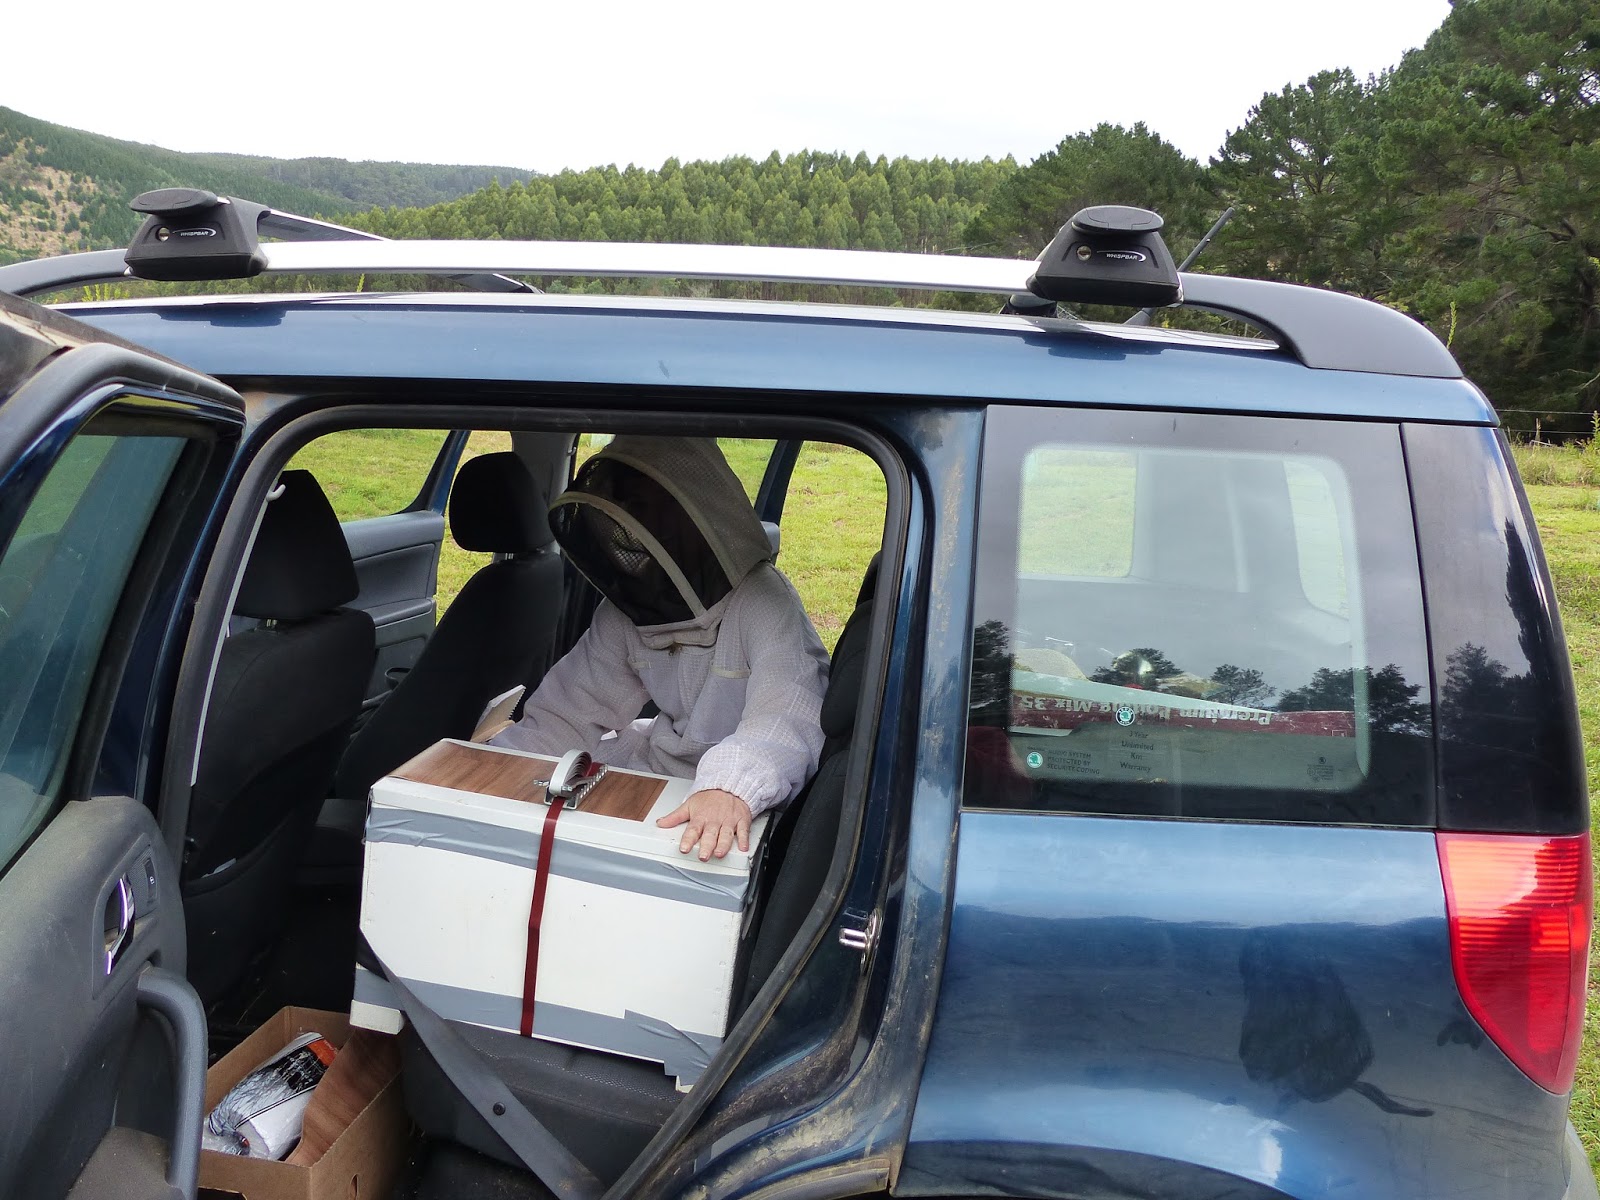

Arriving at final destination

We put the nuc in the pre-determined location and left it closed up for 30 mins to let the bees settle.  


Nuc in position, still closed up

After around 30 min we opened up the nuc and were prepared to exit the area quickly. However there was no rush of bees exiting the hive - just a few came out.

The weather didn't improve and actually got steadily worse throughout the day with heavy rain falling on and off. This meant we were not able to open the hive to transfer the bees into a full size box.  Opening the hive when the weather is too cold will chill the brood. This can  harm and potentially kill a hive.  We had to wait several days for suitable weather to do the transfer.

Two days later was forecast to reach 24 degrees and mostly sunny so things looked promising. After an overcast and drizzly start the promised weather actually arrived about 1 pm so we got to it. The nuc was moved to the side and the full size box was put into position. We made sure the entrance was sited in the same position as the nuc's so bees could easily find their way into their new home.  A honey frame was put on each side of the box (frame positions 1 and 8) and then we opened the nuc. The frames were transferred gently into the new box in the same arrangement as they had been in the nuc.  It's important to do this gently so as not to squash the queen.  We then checked for the queen in amongst the bees remaining in the nuc box and lid but didn't see her.  Our frame of drawn out comb was then put in position 7 and the hive mat was put on top of the frames. Once all this was done we put the ideal box on top. Inside the ideal we put the large plastic container holding the ziplock bag of sugar syrup and made some slits in it so the bees could access the syrup. The lid went on followed by the emlock and all was complete.  We left the nuc on it's side by the hive so that the bees in it could make their way into their new home.


The last of the bees entering their new home. Photo taken late afternoon


We were really pleased with how the whole process went. The bees went quickly into their new home and after a bit of flying around investigating their new digs, foraging recommenced.  Lots of the bees were bringing back pollen so that was a good sign. Some of the pollen was bright orange. Not sure what that was coming from!

Spring at the block this year saw unseasonally cold weather and lots of rain - in short it has been a very bad season for bees throughout the general area. As has been the case for us in Melbourne, beekeepers in the area have had to feed their hives. lt rains a lot there, especially in autumn and winter, and bees confined to the hive can easily work through the stores they've brought in. With this in mind we decided to start this hive off with some sugar syrup. We want the bees to have the opportunity to build up some stores so they can better handle inclement weather and potential dearth of forage. Weather permitting, we'll keep a check on how quickly the sugar syrup is consumed by the bees and feed again as required.


Hive located in shelterbelt, facing east to catch morning sun and shaded from hot afternoon summer sun. Photo taken 6pm. Paddock with cows is next door's block. For those with an interest in agroforestry, the shelterbelt contains mainly silver wattle, blackwood and assorted eucalypts with smaller quantities of several other wattles, banksias, casuarinas and a few western red cedars to maintain an international flavour.


Wednesday, 22 February 2017

Splitting the hive

We have a country block and it was always our intention to put a hive there someday. In December 2016, as a method of swarm control for our backyard hive, we split it and started a new hive.

We purchased a mated queen for the new hive. While we could have let the bees make a new queen from a day old egg we decided not to, for one main reason.  It seems possible that the drones in our area are not the most congenial, to put it mildly. Over several seasons of swarming our hive became progressively more and more aggressive....until it reached a point where things were no longer manageable.  Re-queening was our only option. We purchased a mated queen and to cut a long story short - with some assistance, re-queened the hive.  That was a couple of years ago and things have been great since then.  It was a real beekeeping lesson learnt the hard way - don't let small problems become big ones. Anyway, to avoid a potentially similar experience we decided against letting the hive raise it's own queen.  

Our queen arrived in the mail in a queen cage with some attendants and a candy plug  sealing the cage closed (how amazing is it to get bees in the mail?!!). We kept her in a dark undisturbed spot in the house, giving the bees a a drop of water twice a day for a couple of days until we were ready to do the split.  

Here's a picture of the empty queen cage after it was removed from the hive:

Queen cage - originally contained queen and 5 other bees

Looking straight into cage opening. This was originally blocked with candy.
   
Splitting the hive requires a strong colony and some stored honey. The process involves removing half the brood and some of the stores so your hive must be strong enough to be able to cope with this.

Here is how we made the split:

Day 1
Materials used:
- a spare 8 frame hive box 
- a queen excluder

Our hive consisted of 2 full size boxes. We opened the hive and took out 3 frames of brood, one frame of honey and one frame of drawn comb, replacing them with new frames with starter strips. Checking first that the queen was not on any of the frames we'd removed, we shook the bees off the frames back into the hive. The remaining brood was centred in the box with the new frames placed on the outside edges of the box.  The queen excluder was placed on top of the hive, and then the empty box placed on top of that. The brood and honey frames we'd removed were put into the empty box and the hive was closed back up. Overnight the nurse bees should move up the hive to tend to the brood in the top box. These frames of bees will be used to create the new colony.

Day 2
Materials used: 
- a nucleus hive ('nuc') to start the new colony in.  Our nuc is a 5 frame box.
- the queen in a queen cage

We opened the hive and looked in the top box.  The brood frames were covered in bees - yay! We gently removed the frames with the bees on them and put them into the nuc.  The honey frame and the drawn out frame were placed in positions 1 and 5 in the nuc. The empty top box was then removed from the main hive and that hive was closed up.

The nuc was positioned so that the back of the hive was higher than the front. This is important to allow any moisture to drain out but also for the placement of the queen cage.  The queen cage was placed on the top of the frames so that the end with the candy plug faced upwards. That way if a bee happens to die in the cage, the entrance won't be blocked and the queen can still get out. The hive was then closed up and left undisturbed for a week. During this time the bees in the hive will chew through the candy plug to release the queen. This can take a few days and by the time the queen is released the bees will be used to her smell and there is a good chance they will accept her. (Note that if you are re-queening an aggressive hive then additional steps may be required in order to enhance the chances that the bees will accept the new queen).  


Nuc in foreground, rear view

One important thing to note is that the nuc now contains mainly very young bees and a queen. There may be no foragers.  Hence it's important to ensure that the hive has access to sufficient food until it can forage for itself.  We used an external feeder to feed the bees a 1:1 sugar solution and kept feeding until the hive was populated with older bees.  Even then we still fed to see how quickly the bees took up the sugar solution - our thoughts were if it was emptied quickly they were obviously still hungry so it couldn't hurt to feed them.

After 1 week we inspected the hive, and saw the new queen and plenty of eggs. All was well. Over time the hive built up nicely until it was ready for a bigger box. That was the trigger to relocate it to our country block.... but that's a story for another time.


Friday, 20 May 2016

Bee tongue!

It's been a while since we've posted a backyard bee picture...

I've never noticed a bee flying with its tongue out until I took this photo:


For a better view here's my zoomed in version:


 Neat huh?


Monday, 15 February 2016

Summer honey harvest

At the end of January we harvested 6 full-sized frames of honey from our backyard hive.  Not as much as last year, but hey, once we make sure we leave enough honey for the bees, we're happy with whatever excess we get.

Here's the result:


 And here's the crushed, sticky comb that's left over after all the honey has drained through:


We'll turn that into clean wax.  As you can see the comb was pretty dark and it didn't crush all that easily ...so we may have to try this technique to separate out the wax, rather than the more simple oven method described here. The final step will be to purify the wax using the solar method, as described here.


Thursday, 31 December 2015

It's too darn hot

Another 39 C day - yuk.  Summer in Melbourne can be just too darn hot.  While we and the pets spend time inside in front of the fan, the beehive gets at least some of the hot afternoon sun.

Here's what we do to spare the girls some of the heat.

A polystyrene box full of water and foam floats is placed on top of the hive. 


Not only does the box of water insulate the hive by stopping direct sun hitting the lid, it also means the girls don't have to travel far in search of water to cool the hive.

We also lean a sheet of masonite (foraged from a hard waste collection) against the side of the hive to shield it from direct sun. The masonite board is heavy enough to stay put in mild winds, and the hive location itself is sheltered from the wind, so the system works well.


In addition to observing the hive, we weigh it on a regular basis to get an idea of what's going on inside.  It has been interesting to note this year how quickly the weight dropped over the hot days. Some weight loss is not surprising - instead of bringing in nectar, the foragers are out gathering water to use to cool the hive, and they are consuming their stores in order to have the energy to make the flights. What surprises us is why we didn't note a similar weight drop over the extended hot period we had in Melbourne during the summer of 2014.

How do you manage your hives in summer?


Friday, 18 December 2015

Friday, 27 March 2015

In the garden .....

A few shots of the hard workers in the garden....

bee on perennial basil


bee visiting apricot flower


Getting stuck into a sage flower


Covered in pollen


Saturday, 18 October 2014

Busy as a .....

Busy as a ............yep, you guessed it.......... bee.

Here are some photos taken in our garden last weekend.

bee on sage


bee on rose geranium


bee visiting a stone fruit tree


a beautiful callistemon flower


Monday, 29 September 2014

Bees at the Royal Melbourne Show - 2014 edition

Well it's September and that means Royal Melbourne Show time again in Melbourne. After my experience last year as a volunteer at the Victorian Apiarists' Association (VAA) stand, I was looking forward to doing it all again this year.  


One of the reasons I enjoy helping out at the stand is the opportunity to chat to all the other beekeepers. The VAA volunteers come from all over the state. Many of them have been keeping bees for decades and are huge sources of beekeeping wisdom.  It's a great opportunity for relative newbies like me to tap into that knowledge and I'm not backward about doing that :)

This year, in addition to the great range of Victorian honeys for sale there was also comb honey.


The stall display included a beautiful array of different coloured honeys.


Different types of candles were for sale, as well as beeswax hand cream, beeswax furniture polish and honey soaps.


As well as selling honey and other bee-related products, the stand is a great way to chat to the general public about bees and highlight the important role they play in our food security.  I think people are quite surprised when they discover how much we rely on bees for the fruit, nuts and veg we all take for granted. The image below illustrates the situation nicely.

via


I had a stint at the stall talking to the public who came up to see the observation frame. This is a frame in a ventilated glass case, complete with bees like the one in the picture below.  It's a great way for the public to get up close and see what the inside of a beehive looks like. The frame had some brood, honey, and bees, including a queen, so there was plenty to see.
 
Observation frame at the VAA's outdoor spot in the My Backyard area of the Show


I also spent some time outside the bee cage, describing to the public what the beekeeper was doing inside the cage when he opened the hive.  As usual, everyone was amazed that the beekeeper wasn't wearing gloves as he went about his business.

Hive in the ventilated bee cage


It was a busy day but I did get a brief chance to have a bit of a look around. These crocheted cows made me smile.


I caught up with chicken expert Megg Miller at the Chicken Breeds stand. In addition to being a chicken breeder and poultry expert, Megg is the editor of Australasian Poultry as well as Grass Roots, an Australian magazine about self-reliance, farming, gardening, eco-living, DIY, cooking and craft. Grass Roots is a great magazine, still going strong after first hitting the shelves 40 years ago.  Megg also shares her chook wisdom in magazines such as Organic Gardener and kindly gave a talk to our local permaculture group some years back. She had some of her beautiful chooks on display, one of which was lying on her lap having a  bit of a snooze in the sun while Megg talked all things chicken to the people who visited the display. That was one contented chicken - I wish I had taken a photo!

Frizzle rooster on display with his girls in the Chicken Breeds area
  

All in all it was a very enjoyable day and I look forward to doing it again next year.


Thursday, 25 September 2014

Hive insulation over winter - did it work?

Back in May I mentioned that we were trialling some insulation on our hive over winter. The previous winter we had noticed that there was a fair bit of condensation in the hive - on the top mat and under the lid.  In an attempt to avoid that this year we used some wall insulation sheeting, laid directly on the frames in the top box, as described here.  Now, almost one month into Spring and with the days warming up, it was time to look inside the hive and assess how well the insulation had worked.

When I removed the lid I was pleased to see that the hive mat and insulation sheet were  both dry, as was the underside of the lid.  This was a big improvement over last year.


Peeling back the insulation I could see that there were lots of bees in the top box. They had glued the insulation sheeting to the top bars in a few spots but it was still very easy to peel back and remove.


I checked the second frame in the top box (second from right in picture above) and it was about 80% capped brood, laid in a good solid pattern.  All looked well. A check of the bottom board showed it was clean and dry.

It seemed that the insulation had done a very effective job of reducing condensation in the hive over winter.  We'll take it off over spring and summer but will definitely use it again next year when we pack down for winter.

Have you had an issue with condensation in the hive?  If so, what did you try? How well did it work?


Monday, 15 September 2014

Weighing the hive

One way to get an indication of what's happening inside a beehive without having to open it up is to weigh the hive. There are several reasons why this useful.

Firstly, weighing a hive can be done regardless of the weather. This is especially useful during winter when it's too cold/wet/windy to open the hive. Regular weighing allows the beekeeper to assess the amount of stores the hive has. This information can then be used to assess whether supplementary feeding may be required.

Secondly, weighing the hive does not disturb the hive environment. Understanding the importance of the hive temperature and humidity, how this affects hive health, and how to use this knowledge to look after your bees is important. Bees expend considerable energy to maintain the ideal temperatures and humidity inside the hive. Opening a hive and especially moving comb can cause rapid and dramatic shifts in both those variables and cause undue stress for the bees. According to David Heaf in his book The Bee-friendly Beekeeper, every opening of the hive that lets the heat out forces the bees to repair the damage - repropolising and repairing comb that may have been broken - and to restore the 'thermal structure' of the colony by extra heat producing activity. In winter, the cluster can take as much as 3 days to return to normal. Depending on the extent of comb manipulation, even in summer the restoration of the pre-opening condition could take as much as a day. Thomas Seeley, the well-known bee biologist, found in his 2007 study, Honey bees of the Arnot Forest: a population of feral colonies persisting with Varroa destructor in the north-eastern United States, that feral bee colonies left alone were able to better co-exist with Varroa mites than those managed in a more conventional way.  So while it is tempting to want to open your hive frequently to check for problems and progress it's worth bearing in mind that bees carefully manipulate the environment inside their hives and any disruption to that environment can cause or exacerbate the very problems that you are checking for.

The system we use to weigh our hive was invented by Andrew Janiak, convenor of the Natural Beekeeping group, of which we are members. Andrew and his clever beehive scales were featured on the ABC New Inventors television program where his scales won the Peoples' Choice award.  More details and a short video showing how the scales work can be seen here.

Essentially the system consists of a simple hinged timber platform that sits permanently under each hive, and a light weight portable frame that holds the scale. The scale is inserted between the two halves of the platform (at the rear of the hive) then the handle is moved to determine the weight.

Here are some photos of the platform. The hive is positioned on the base so that the entrance is above the hinged edge. (The hinged edge is on the left side in the first picture below)


Here's a picture of our hive sitting on the base:


The scale consists of a light-weight metal frame which is easily carried from hive to hive. The platforms are very cheap to produce, costing only about $4-5.00 each.

Here's a picture of the scale positioned on the base, ready to be used. A 'hive' consisting of a couple of empty boxes is being used here for demonstration purposes. You can see that with the handle in the down position the hook is raised. The legs of the frame are sitting in the metal guides. The metal guides can be seen more clearly in photo 2 above.

Frame sitting in position on base

 
Zero the scales before engaging the hook


To measure the weight of the hive you firstly position the scale so that it sits in the metal guides in the platform. The next step is to zero the scales and then lift the handle to allow the hook to move down so it can be manually attached to the platform. Once the hook is engaged, the handle is gently pushed down until it can move no further. Pushing the handle down raises the hook and thus the platform. Once the handle is in the fully 'down' position the weight is recorded. The scale has leverage of 1:10 so you only need to lift a tenth of the weight of the hive. It is also impossible to lift the hive more than a few cm, meaning there is less chance of disturbing the bees or toppling the hive.
 
Move the handle down to weigh the hive. This will raise the hook and in doing so, lift the base.
When handle is fully extended downwards and scale light stops flashing the weight is recorded.


The amount of force required to push the 2 halves of the platform apart determines the weight of the hive. The scale is actually set to show 1/2 of the weight of the hive, then you can multiply to get the whole weight.

By keeping regular weight records over the year the beekeeper can get a picture of how the hive is performing. Of course, to ensure consistency it's best to take the measurements at the same time of the day, preferably early evening when everyone is back inside for the night. That way your results will be comparable. The weight going into and out of winter is very useful to help determine how much in the way of stores the bees used over winter. Also, if you have several hives you can use this method to help identify any hives that may be struggling, allowing you to take the appropriate action before it's too late. Weight data is also a handy way to identify if there is a honey flow on as the hive will quickly put on weight.  We use weight data to help identify when a super is ready for harvesting.

While not removing the need for occasional inspections, weighing the hive reduces the need to continually open it up and disturb the bees. We've been weighing our hive on a weekly basis for over a year now, and thanks to Andrew's scales, it's quick and easy to do.  The information we're gathering is helping us better manage our bees and in our opinion it's definitely worth the small amount of effort involved.


Monday, 7 April 2014

Hands-on beekeeping experience

There's a lot to learn about keeping bees. It's a really good idea to get a solid understanding of what you're getting yourself into before you commit to getting a hive of your own. Reading some books on beekeeping is a good start. Getting some hands on experience is the next step.

We all need to know what we're looking at when we open our hives.  Natural beekeeping places an emphasis on preserving the hive environment. While this translates into less openings of the hive, that doesn't mean natural beekeepers don't responsibly manage their hives. Understanding what you see when you open your hive is integral to responsible hive management. 

So where can you get some hands-on experience?  If you live in Melbourne then a good source of free beekeeping training is the Collingwood Children's Farm Apiary. We wanted to gain some experience opening a hive and knowing what to look for before we got our bees so that's where we went.

The Collingwood Children's Farm is a not-for-profit community resource which aims to provide country experiences for city people. It's located just 5 km from the centre of Melbourne along the Yarra River. Consisting of 17 hectares of paddocks, gardens and orchards, and with a large range of animals, it is open every day from 9-4.30 pm. It also has a cafĂ© and a Farmer's Market on the 2nd Saturday of each month which is well worth a visit.

The Apiary at the Collingwood Children's Farm is staffed by experienced beekeepers from the Melbourne section of the VAA. They kindly volunteer their time and effort to educate the public about bees and beekeeping.  It's open to the public on the 2nd and 4th Sundays of the month from 11-4 pm.  All you need is an interest in bees - protective gear and supervision is available if you want to get up close to a beehive.


The Apiary at Collingwood Children's Farm - with the city skyline in the background

An experienced beekeeper instructs a novice

For those content to view the action from further away there is a caravan with a window out onto the apiary. From inside the caravan you can view the beekeeping activities being undertaken. The caravan also has a window into an observation hive so visitors can get a close up view of bees inside a hive without the need to gear up or disturb the bees.


viewing the action up close and also from inside the caravan

We found that regularly visiting and volunteering at the CCF apiary was a great way to build up our confidence in preparation for getting our own hive. The experienced volunteers are friendly, patient and extremely knowledgeable - they're always happy to share their experience and answer questions.  These guys, some of whom have 30+ years of beekeeping experience, say there is no end to what you can learn about bees and beekeeping. 

We'd heartily recommend going along to the CCF apiary if you are thinking about keeping bees.  Suit up and get amongst it - you'll soon know if beekeeping is the hobby for you.

Images 1 | 2 | 3