When we were at the Lost Trades Fair, we signed up to do a spoon carving workshop at Rundell & Rundell. A few weekends ago we headed back to Kyneton to learn how to carve spoons from experienced spoon carver, Pete Trott.
There are lots of ways to make spoons from green wood. Some methods use power tools and other machinery to get the spoon to the point where it's ready to hand carve. The method Pete taught us used 3 tools only: an axe to shape the spoon blank from a piece of wood and 2 simple Swedish hand carving knives. That was it - we're not even talking using sandpaper here. So what do Pete's spoons look like? Well as you can see below, they are beautiful as well as functional. Unfortunately my photo doesn't do justice to showing how smooth their finish was or how lovely they felt in the hand.
Okay, the first thing we did was select a piece of blackwood (Acacia melanoxylon) for our spoon. The wood was cut that morning. Here's what we had to select from:
As you can see, there was a long way to go to turn that lump of wood into a spoon!
For a workbench we each had stump with a divot cut out of the centre where we could place the wood to stop it slipping while we were using the axe.
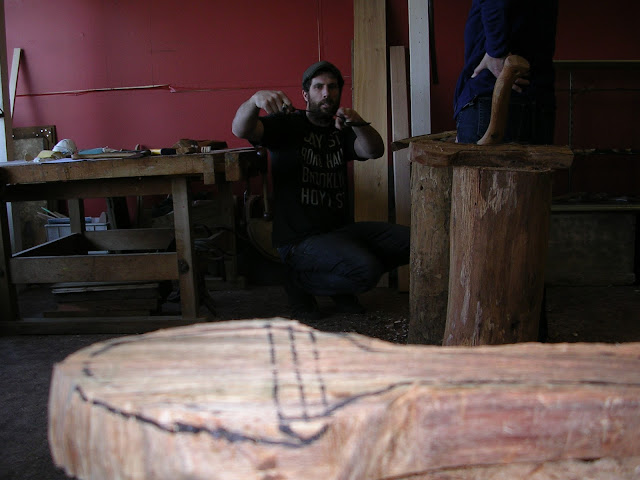
Once we'd selected a piece of wood we drew our spoon shape on it. Looking at the grain and the shape of the wood helped determine where best to draw the spoon. The thicker end became the bowl as that enabled a deeper spoon.
After a safety demonstration it was time to start axing that wood. I'll admit first up that I have no axe skills. It's Mr PragSust who chops all our wood at home. So it took me a while to get the hang of it. Pete drew a picture showing us the chopping directions we'd need to use.
We held end of the wood in one hand and used the axe with the other, making sure the hand holding the wood was well away from the axe. I eventually chopped out a rough spoon shape, known as a spoon blank.
Here's a shot of the axe I used:
And here's Pete, providing instruction on the shaping of our spoons and encouraging us:
Once we had the rough blank it was time to start shaping it. The lines across the spoon indicate where a wedge was to be made using the axe.
And here's my wedge:
Now it was time to start shaping the underneath of the spoon. First was to cut away the portion underneath the tip - that's the part underneath the black line in the above photo.
Here is the work in progress. The circle was drawn on the base of the spoon to indicate the area to leave as is. We're still using an axe for all the shaping at this point.
There was more shaping to do, as indicated by the lines drawn along the handle and the lines for cutting another wedge.
Once I'd cut away that excess wood, it would be time to start using the hand carving knives.
I didn't progress as far as I'd hoped on the day, but it was not surprising given my lack of axe handling experience. The axe cutting has to be done in a controlled and careful manner - cut too far and you have to start again from scratch with another piece of wood.
Pete showed us how to use the 2 Swedish hand carving knives and I had a bit of a go at carving out the bowl of my spoon before we had to pack up for the day. There were hand carving knives for sale and I bought a pair so I could finish off my spoon at home. They are super sharp and it would be very easy to take a big slice out of a finger .... so I will be sure to be very, very careful. Pete suggested that we use plenty of elastoplast on fingers and thumbs to protect them when we are carving. I'm think that as a precaution perhaps kevlar gloves might also be in order.
For those of us who didn't finish our spoons, Pete advised us to wrap them in gladwrap and store them in the freezer until we were ready to do some carving. Spoon carving is best done with green wood. Once Blackwood dries out it is very hard and trying to hand carve it would be a nightmare.
I'd say I have quite a few more hours to go to finish my spoon. I'll post an update on my progress. Of course the more spoons you make the quicker you get at it. Pete, for instance, whipped up a spoon blank and had it shaped and ready to carve in next to no time. We have a good supply of bits of wood that would be suitable for spoon carving so it's something I'd like to get better at :)
Saturday, 6 June 2015
Winter evenings.....
Winter has arrived in our neck of the woods, and for me, that means it's time to dig out the needles and enjoy evenings sitting by the fire doing some knitting.
Here's what's come off the needles lately ....
You can read more about why I like knitting socks here.
Here's what's come off the needles lately ....
You can read more about why I like knitting socks here.
Subscribe to:
Comments (Atom)


